Vectorizing
Now that you have some sketching of your brand marks done you will want to choose three that you really like. Take some time to refine these three sketches and try to simplify them. After making these alterations you will need to take these three sketches into Illustrator and vectorize them. Remember to try using simple shapes and the pathfinder tool to keep things easy on you. The pen tool is very powerful, but sometimes you can get better results using simple shapes.
Here are some video links for additional learning about the pen tool, path finder palette and manipulating simple shapes.
- Adobe Pen Tool Basics
- Pathfinder Palette Example
- Adobe Illustrator Logo Design
- Create Flat Vector Object in Illustrator
- Find more with a simple Google search
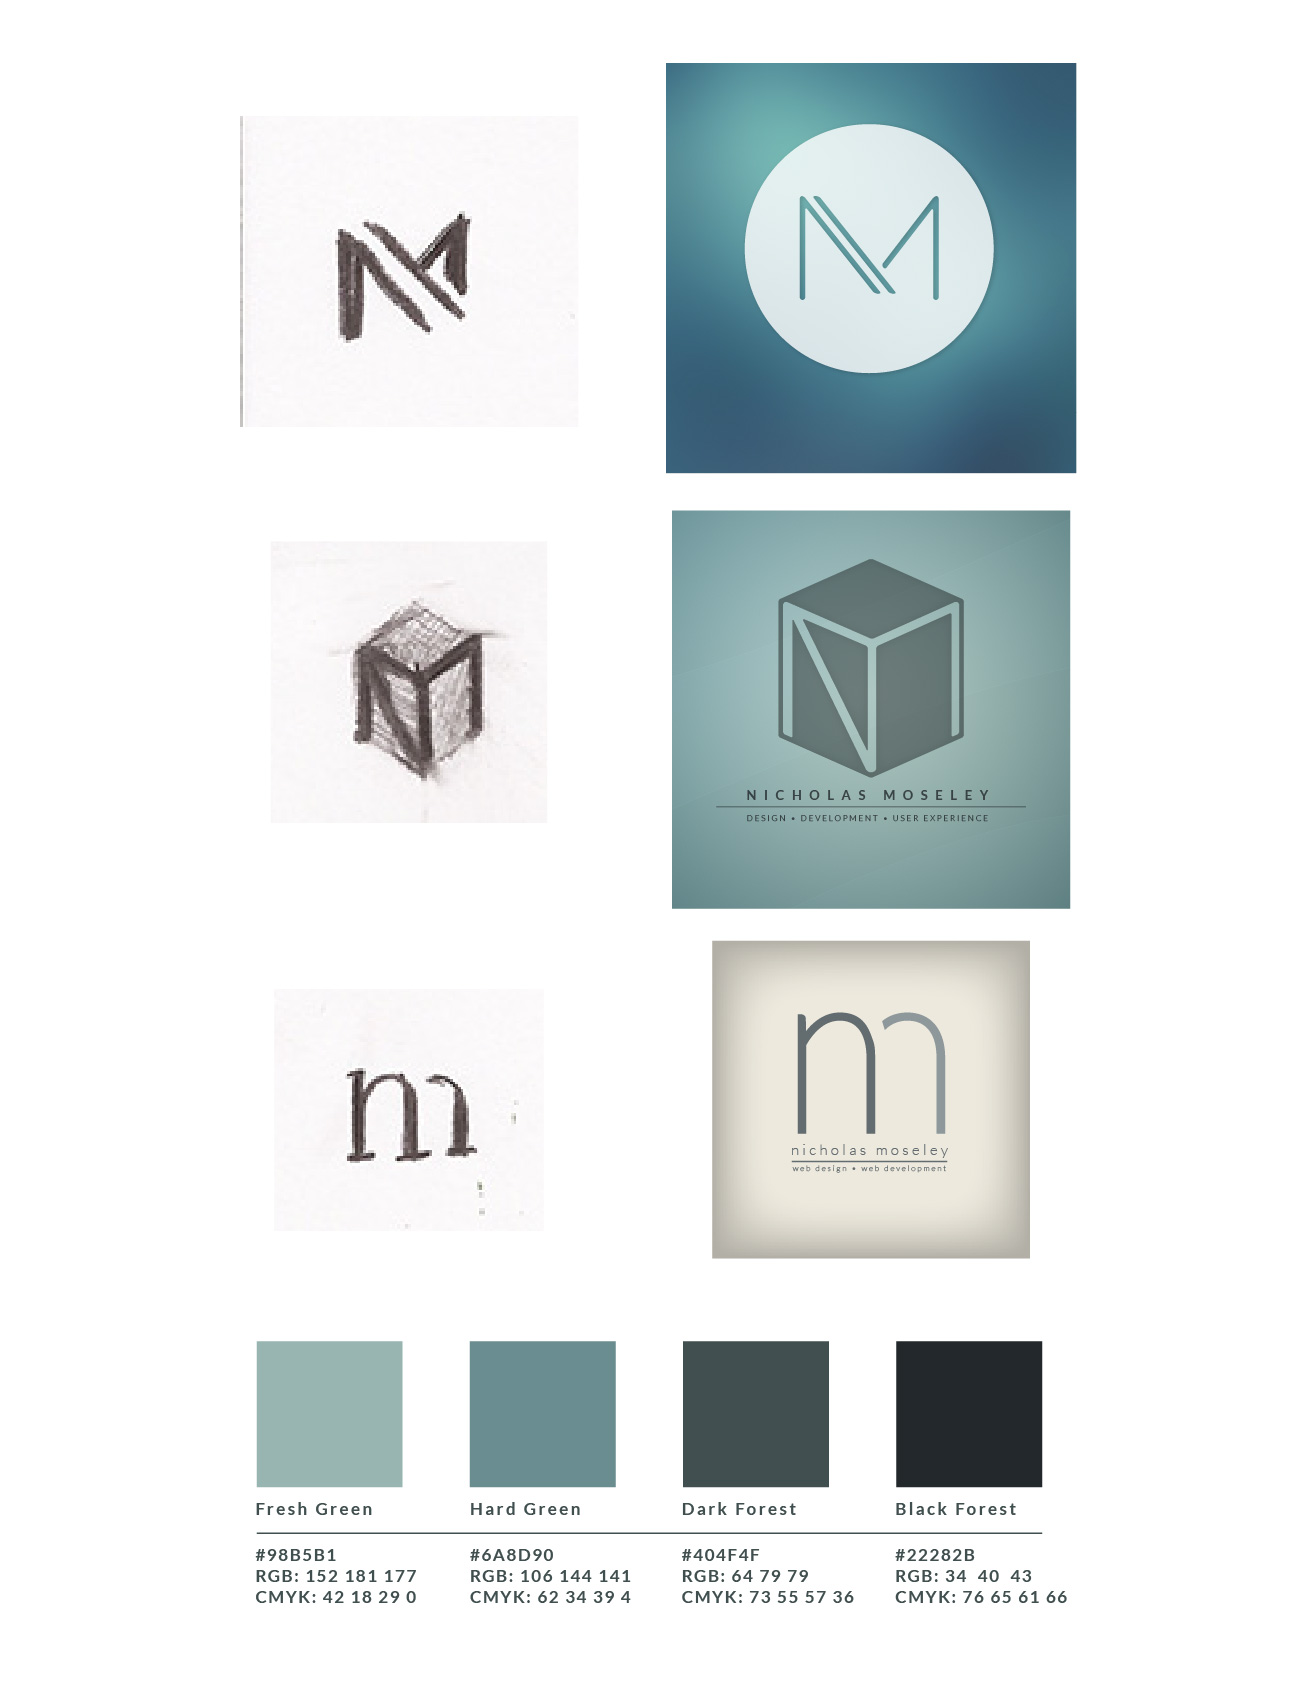
After vectorizing your three logos you will organize a document that shows three vectorized brand marks next to the original sketches (Before and after). Include any alterations (if any) between the sketch and the final vectorized version. You will later place the color scheme chart under these before/after images.
Color Scheme
- DesignSeed.com
- Kuler.Adobe.com (Kuler can also be accessed inside of Adobe InDesign)
- ColourLovers.com
- 10 Super Useful Tools …
Create a simple chart of the color scheme using Photoshop that includes the color names, a square swatch of the color, and the RGB/CMYK values for each. This could be as simple as a screenshot from Kuler. Make sure the screenshot has all the required information. Place this color scheme chart under the three logo marked (before/after). Save this document as a JPG image, ready for inclusion into your weekly blog post.
Example
Submission
This activity can be included in any of your updates, but this activity must be included also in your final project blog post.
Recent Comments